
Why Ditch the Plastic SIM on Your Next Trip
Your Ultimate Guide to Using an eSIM for International Travel
Most travelers don’t realize an eSIM can be bought, installed, and activated before their plane even lands, working instantly upon arrival. It replaces your physical SIM with a digital profile that connects to local networks, letting you skip expensive roaming fees entirely. Simply scan a QR code from a provider, pick a data plan for your destination, and you’re online with reliable service almost immediately.
Why Ditch the Plastic SIM on Your Next Trip
Ditch the plastic SIM on your next trip to unlock instant connectivity the moment you land. With an eSIM for travel, you avoid hunting for local shops or swapping fragile cards. Activate a data plan online before departure, keeping your primary number active for calls and two-factor authentication. No more fiddling with tiny trays or risking losing your physical SIM. Activating an eSIM takes under five minutes, allowing you to stream maps or message family while others wait in airport kiosk lines. Switching regions is effortless—add a new profile instead of buying another plastic card. You maintain seamless access to ride-sharing, translation apps, and hotel check-ins without logistical headaches. It’s pure, adaptable travel freedom, eliminating the guesswork from staying connected abroad.
Hidden fees at the airport kiosk
Airport kiosks disguise hidden fees within package pricing, often adding an activation surcharge that inflates the quoted cost by 30-50%. These fees are rarely itemized upfront, appearing only on the final receipt after you enter payment details. The typical structure buries them under vague terms like “service charge” or “connection fee.”
- An “eSIM activation fee” ranging from $5 to $15 per profile
- Currency conversion markups of 4-6% on the retail price
- A “temporary number issuance cost” for any local voice line
- Administrative surcharges applied per-day rather than the plan’s flat rate
The nightmare of finding a local carrier abroad
Scouring foreign streets for a local carrier is a travel nightmare. You waste hours translating confusing prepaid plans, only to find your phone’s IMEI is incompatible or the shop demands a local ID you lack. Incompatible phone models are a common pitfall, as many budget carriers lock devices to regional frequency bands. After queuing, you might activate a data pack that throttles speeds instantly or expires before your trip ends. This chaotic hunt contrasts sharply with eSIMs, which let you purchase and activate a local profile from your hotel bed, bypassing language barriers, store hours, and hardware restrictions entirely.
Instant activation before you leave home
Forget hunting for a local SIM shop after a long flight. With an eSIM, instant activation before you leave home is a total game-changer. You simply buy and install the digital plan while still on your couch, connected to Wi-Fi. Then, when you land, your phone works immediately without scanning QR codes or juggling tiny plastic cards. Here’s how simple it is:
- Open your phone’s settings and tap on “Add eSIM.”
- Scan or manually enter the activation code from your email.
- Set your new eSIM as the data line, and you’re done.
How Virtual SIM Cards Actually Work While You Roam
When you roam with an eSIM for travel, your device downloads a digital virtual SIM profile that acts as the key to a local network. Instead of swapping plastic cards, your phone connects over the air to a partner carrier’s tower wherever you land. The virtual SIM authenticates via an encrypted IMSI, then routes your data through a local tunnel before reaching the home network, which slashes latency and avoids sky-high standard roaming fees. You keep your primary eSIM active for calls or SMS, while the travel eSIM handles data seamlessly—all managed from your phone’s settings without needing a physical swap.
Scanning a QR code versus swapping physical cards
For global roaming with an eSIM, scanning a QR code is leagues faster than swapping physical nano-SIMs. You just frame the QR with your camera, tap install, and you’re connected—no fumbling with tiny card trays or worrying about losing the original. Swapping feels oddly retro now, like hunting for a payphone in an app world. This convenience makes instant QR activation the clear winner for hopping between countries, as you can purchase and install a new plan at your gate without unsealing your phone’s waterproofing. Physical cards add logistical drag; scanning is pure digital simplicity.
Keeping your home number active alongside a data plan
Keeping your home number active alongside a data plan is achieved by configuring your primary physical SIM for voice and SMS while the eSIM handles data. You must disable cellular data on your home SIM to avoid roaming charges, relying entirely on the eSIM’s data line. For two-factor authentication or urgent calls, enable “Wi-Fi Calling” on your home number before departure, as it will route calls over the eSIM’s internet connection. This setup lets you receive calls and texts on your original number without paying high roaming rates for data. Home number retention via secondary data eSIM requires your phone’s dual SIM settings to be properly assigned.
Keeping your home number active alongside a data plan means using its SIM for calls and texts only, while the eSIM supplies data, often with Wi-Fi Calling enabled to avoid roaming fees.
No more hunting for a paperclip to eject trays
With an eSIM for travel, you will never again need a paperclip to eject your SIM tray. Activating a new local plan involves simply scanning a QR code or tapping a carrier app, a process that eliminates the frantic search for a tool. This direct setup via software means the physical tray stays untouched. The practical sequence is: no paperclip ejection required. First, purchase the eSIM data plan online. Next, scan the provided QR code with your device’s camera. Finally, complete activation in settings, instantly adding the roaming profile without any hardware fiddling.
Choosing the Right Data Package for Your Destination
Selecting an eSIM data package for travel hinges on matching coverage to your specific itinerary. First, verify that the provider offers native network support in every country you will visit, not just roaming partnerships, as this impacts speed and reliability. Estimate your usage: a 1 GB weekly plan suffices for maps and messaging, but streaming or video calls demand at least 5 GB. Check the package’s validity period to ensure it lasts your entire trip, and confirm activation rules—some require setup before departure. A common question is: “What if I run out of data mid-trip?” Most providers allow instant top-ups via their app, so choose a platform that supports seamless add-ons without requiring a new eSIM. For multi-country trips, a regional package often costs less than separate national plans.
Regional plans versus country-specific options
When selecting an eSIM, weigh the cost-efficiency of a regional plan versus country-specific data against your itinerary’s density. A regional plan, covering multiple nations, offers seamless connectivity across borders without reconfiguring settings, ideal China eSIM for multi-country trips with short stays per location. Conversely, a country-specific option typically provides larger data allowances at a lower per-gigabyte cost for a single destination. If your travel involves prolonged stops in one country, the specific plan wins on value. However, for a week galloping through three Schengen countries, the regional plan’s convenience and uniform pricing outweighs the marginal savings of juggling separate local eSIMs, simplifying budget management.
How to estimate your daily gigabyte needs
First, audit your typical app usage. Streaming video consumes roughly 1 GB per hour at standard definition, while music streaming uses about 150 MB hourly. For navigation, allocate 5–10 MB per hour of map usage. Social media browsing with images uses 200–300 MB daily. Multiply your specific daily minutes of high-consumption activities by these rates. Many travelers overestimate by 30%, so track your actual phone data consumption via settings for one week before departure. If you are a moderate user mixing messaging, maps, and occasional streaming, a daily estimate of 1–2 GB often suffices, while heavy video users should plan for 3–5 GB per day.
Unlimited data traps and fair usage policies
An “unlimited” travel eSIM data plan often conceals a fair usage policy trap that throttles speeds after a specific threshold (e.g., 1–5 GB daily). This hidden cap renders the plan unusable for video calls or GPS navigation. Always review the fine print for post-throttle speeds, which can drop to 128 kbps—effectively breaking connectivity. Some providers apply per-day limits on “unlimited” plans, resetting the allowance only at midnight local time. To avoid disappointment, confirm that the declared speed tier applies to your entire trip, not just the first megabyte.
Top Providers That Specialize in International Connectivity
When traveling, Airalo stands out for its vast global coverage, offering affordable local data packs in over 190 countries without the hassle of swapping physical SIMs. Holafly is another key player, specializing in unlimited data plans that ensure you remain constantly connected, perfect for heavy data users on the go. For those seeking carrier reliability, GigSky provides robust global eSIMs with strong network partnerships, making it a solid choice for business travelers. While many providers focus on quantity of destinations, the true distinction lies in their connection speeds and customer support responsiveness during a trip. These specialists eliminate roaming fees and let you activate data instantly upon arrival.
Budget-friendly picks for short trips
For short trips under a week, the most cost-effective eSIM providers offer region-specific plans rather than global packages. Budget-friendly travel eSIM options typically include a fixed data allowance (e.g., 1–3 GB) valid for 3–7 days in a single country or adjacent region. To maximize value without waste, follow this selection process: first, identify your destination’s local networks that partner with eSIM providers; second, compare per-GB prices on daily plans (e.g., $1–$3 per GB for 3-day passes) and avoid “unlimited” offers that throttle speed after a low cap; third, confirm the plan activates instantly upon arrival to avoid manual setup fees. A clear sequence for optimizing cost is:
- Check coverage for the specific city or route (rural zones often require separate top-ups).
- Select a pay-as-you-go plan with auto-top-up disabled to prevent accidental overcharges.
- Use the provider’s app to track data usage daily, ensuring you exhaust the allocated budget without buying surplus.
This ensures you pay only for what a short itinerary consumes.
Premium carriers with global coverage
Premium carriers with global coverage, such as Airalo’s Global eSIM or Holafly’s World eSIM, offer seamless connectivity across dozens of countries on a single profile, eliminating the need for multiple local SIMs. These providers typically partner with tier-one networks to deliver high-speed data in 100+ destinations, though plans often prioritize data over local voice numbers. Travelers should verify that their destination aligns with the provider’s primary network partner for optimal speeds. Activation is instant via a QR code, and top-up options are available for extended trips. Q: Do these global eSIMs throttle speeds after a data cap? A: Yes, most premium global plans reduce speeds once the high-speed allowance is exhausted, though unlimited data options with throttling after a daily cap exist.
App-based management and top-up ease
Leading providers like Airalo and Holafly prioritize app-based top-up ease through streamlined interfaces. Users manage multiple eSIM profiles, check remaining data, and purchase additional bundles directly within the app, often with one tap. These apps offer real-time balance alerts and automated activation of new packages upon depletion, eliminating manual intervention. Providers such as Nomad and Ubigi extend this convenience by integrating multiple payment gateways and allowing fractional top-ups, ensuring travelers avoid overpaying for unused data while maintaining seamless connectivity.
Compatibility Checklist Before You Buy
Before purchasing an eSIM for travel, run a focused compatibility checklist to avoid connectivity headaches. First, confirm your smartphone is carrier-unlocked and supports eSIM technology—most newer iPhones, Pixels, and Samsung Galaxy models do. Next, check that your device’s specific model number isn’t a locked or regional variant, which can block eSIM activation. Then, verify your home network’s current status, as some carriers lock the phone’s eSIM slot until you’ve paid off the device or requested an unlock. Finally, ensure your eSIM provider explicitly lists your phone model and destination on their supported devices page. A single mismatch here means wasted money and no data abroad.
Checking if your smartphone supports dual SIM
Before purchasing an eSIM for travel, confirm your smartphone supports dual SIM functionality with eSIM. Check your device settings: navigate to “Cellular” or “Mobile Data” to see if an “Add eSIM” option exists alongside a physical SIM slot. For precise verification:
- Go to your phone’s “About Phone” section and locate the model number.
- Search that model on the manufacturer’s official specifications page for “Dual SIM (eSIM + physical SIM).”
- Ensure your region-specific variant supports both, as hardware often differs by market.
This ensures you can keep your home line active while activating a travel eSIM.
Carrier lock restrictions and how to bypass them
Carrier lock restrictions prevent your phone from accepting a foreign eSIM, rendering it useless for local data plans. To bypass this, first confirm your device is carrier-unlocked by checking “Cellular” settings for a “Carrier Lock” status. If locked, you must request an unlock from your current provider—often requiring the device to be fully paid off. For a carrier lock bypass, you cannot use software tricks; only the carrier can remove the lock. Once unlocked, follow these steps:
- Insert a non-compatible SIM to force the phone to prompt unlock.
- Connect to Wi-Fi and complete the carrier’s unlock confirmation.
- Reboot, then install your eSIM profile from the travel provider.
Confirm the unlock is permanent before traveling.
Android versus iOS setup nuances
When setting up an eSIM for travel, Android versus iOS setup nuances can trip you up. On an iPhone, the process is nearly identical across models: you scan a QR code in Settings > Cellular, and iOS automatically assigns the new line as secondary. Android, however, varies wildly by manufacturer—Samsung phones may prompt you to label the eSIM instantly, while Google Pixels treat eSIM activation through their own “Mobile Network” menu. A key difference: Android often requires you to manually toggle “Use eSIM for data” after installation, whereas iOS defaults to using it for data only if your primary line is inactive.
- iPhone uses a universal QR code scan flow; Android’s menu path shifts between brands (e.g., Settings > Connections vs. Settings > Network & Internet).
- iOS automatically pauses your primary SIM; Android may need you to disable the physical SIM for data to avoid unintended roaming charges.
- Pixel and Samsung devices often ask for a confirmation code (e.g., “SM-DP+ address”), an extra step absent on iPhones.
Installation Steps Without the Headache
The headache of fumbling with physical SIMs at a foreign airport vanished when I scanned the QR code from my booking email while still in the departure lounge. Within 90 seconds, my eSIM profile was installed, and the phone prompted me to set it as my primary data line. A quick toggle in cellular settings ensured my home number stayed active for calls, while the travel eSIM handled the local network. The only confusion came when the data didn’t kick in immediately—restarting the phone fixed it instantly. The entire process took less than three minutes, leaving me to grab a coffee instead of hunting for a SIM kiosk. Q: What if the installation fails mid-trip? A: Delete the eSIM profile in settings, re-scan the original QR code or re-enter the SM-DP+ address from your provider’s app, and restart.
Preloading profiles at home over Wi-Fi
To avoid data struggles upon arrival, install your eSIM profile at home over a stable Wi-Fi network. This step is a crucial pre-travel setup that downloads the digital profile before you depart. Simply scan the QR code from your provider’s email or app while connected to Wi-Fi. The profile installs instantly, requiring no cellular signal. Once done, activate the profile only when you land and need data, keeping your primary line off to prevent roaming charges. This front-loads the entire activation process, ensuring seamless connectivity the moment you switch off airplane mode.
Switching between primary and secondary lines
Switching between primary and secondary lines during travel is managed directly in your phone’s cellular settings. You designate your home SIM as the primary line for calls and SMS, while assigning the eSIM data plan as your secondary line. To avoid roaming charges, ensure data roaming on the primary eSIM profile is toggled off. Most devices allow you to switch which line provides mobile data with a single tap, letting you test different eSIM carriers without removing your primary SIM. This setup keeps your main number active for verification codes while routing all internet traffic through the travel eSIM.
Switching lines requires only toggling data assignment in settings, keeping your home number active while using the travel eSIM for connectivity.
Troubleshooting common activation errors
When troubleshooting common activation errors during eSIM installation, first verify your device is unlocked and supports eSIM profiles. If the QR code fails to scan, manually enter the SM-DP+ address and activation code provided. A “No Service” error often stems from incorrect APN settings; configure them as per your provider’s guide. For persistent failures, toggle airplane mode or restart your device to force a network refresh. Ensure a stable Wi-Fi connection during download, as interrupted data can corrupt the profile. If the eSIM installs but data doesn’t flow, check that data roaming is enabled in your cellular settings, as this is the most overlooked step.
Savings Hacks for Frequent Flyers
Frequent flyers can slash roaming fees by using eSIM for travel to snag local data plans straight to their phone. Instead of paying daily carrier fees, load a regional eSIM before your trip to lock in cheaper rates across multiple destinations. Buying a multi-country plan often costs less than separate single-country ones, especially for inter-European or Asian flights. Stack savings by skipping airport Wi-Fi passes and using your eSIM’s data for free messaging apps. For layovers, grab a short-term plan covering just the transit country instead of activating full coverage. This way, you only pay for data you actually use on each leg of your journey.
Buying multi-country bundles before departure
For frequent flyers, pre-purchasing multi-country eSIM bundles before departure locks in lower rates compared to buying separate local plans or paying per-GB roaming. These bundles aggregate coverage across your entire itinerary—often spanning continents—into a single, non-expiring data pool (e.g., 10GB across Europe and Asia). Activate only when you land; the clock starts on first use. Avoid the risk of coverage gaps by verifying the bundle includes every stop on your route. Is a global bundle always cheaper than region-specific ones? No—if you visit only adjacent countries, a regional bundle for that bloc (e.g., “Europe 33”) typically offers lower per-GB cost than a worldwide plan.
Comparing eSIM marketplaces for price drops
When hunting for travel eSIM deals, don’t just buy from the first marketplace you see. Instead, open tabs for Airalo, Holafly, and esim.net, then look for identical 5GB Asia plans or 1GB Europe options. Prices often fluctuate by a dollar or two; one store might offer a flash discount while another has a daily loyalty price. Also, check if a marketplace has a price drop alert tool for specific eSIMs, which notifies you when the cost falls. Bookmarking these comparisons before your trip can save you the change for a coffee at the airport.
Comparing eSIM marketplaces for price drops means checking multiple storefronts for the same data plan and using any built-in price alerts to catch temporary savings before you buy.
Using referral codes and loyalty discounts
Maximize your travel eSIM savings by stacking referral codes from friends with your own loyalty program. Many providers reward you with free data or account credits when a new user signs up with your unique code. Combine this with loyalty discount stacking, where repeat purchases unlock tiered price cuts or bonus gigabytes on your next trip. Track your referral links in your account dashboard to see credit accumulation. For frequent flyers, this turns every eSIM top-up into a strategic move, slashing costs across multiple destinations without compromising connectivity.
When a Physical SIM Still Beats the Digital Option
For the frequent traveler, eSIMs for travel offer instant connectivity, but the physical SIM still dominates when reliability is non-negotiable. In countries with spotty eSIM infrastructure, a physical SIM can be swapped between unlocked devices instantly if your primary phone fails, a lifeline digital options can’t match. You also avoid the gamble of roaming profiles that won’t activate upon landing. When crossing remote borders where local network whitelists block eSIMs, a traditional card you slot in provides guaranteed access. Physical SIMs also let you lend your connection to a companion’s phone or a backup device, something locked digital profiles prevent. Ultimately, for the traveler who values fail-safe flexibility over convenience, the tangible card remains an unbeatable backup.
Destinations with limited eSIM infrastructure
While eSIM adoption grows, regions like rural parts of Africa, Central Asia, and many Caribbean islands still lack reliable network support for the profile. In these locations, local carriers often do not offer eSIM activation at point-of-sale, leaving travelers with costly roaming or no connectivity. A physical SIM remains the pragmatic choice for offline eSIM setup failure, as inserting a local chip ensures immediate, stable access. Without a functional eSIM pathway, relying on a plastic card guarantees service where digital provisioning remains unavailable or incomplete.
Older phone models lacking eUICC support
For travelers using older phone models lacking eUICC support, the physical SIM remains the only viable connectivity option. These devices, typically released before 2018, cannot store or switch carrier profiles digitally, making legacy hardware incompatibility a hard barrier to eSIM adoption. Users must purchase a plastic SIM locally or prepurchase one before departure, as no software fix can enable eUICC on unsupported chipsets. This limitation actually simplifies travel logistics for those who prefer a single, unchanging carrier without managing multiple profiles.
- No built-in eUICC chip means no digital profile download is possible
- Carrier locking on older phones can restrict physical SIM swapping abroad
- Dual-SIM adapters (e.g., those using the microSD slot) may offer a workaround but risk compatibility errors
- Battery life on older models can degrade faster when using a physical SIM in poor signal areas
Cheaper prepaid deals in certain regions
In regions like Southeast Asia and Latin America, local prepaid SIMs often undercut eSIM data packages by a significant margin. A physical SIM from a kiosk in Bangkok might offer 30GB for a fraction of what a digital eSIM plan costs for the same validity. This makes physical SIM frugality essential for budget travelers spending extended time in a single country. You simply swap the SIM and reload with cash, avoiding the cross-region pricing premiums baked into many eSIM wholesale deals.
Cheaper prepaid deals in certain regions stem from local retail competition and overhead-free distribution, giving physical SIMs a clear cost edge over eSIMs for budget-focused, single-country stays.
Managing Multiple Profiles for Different Countries
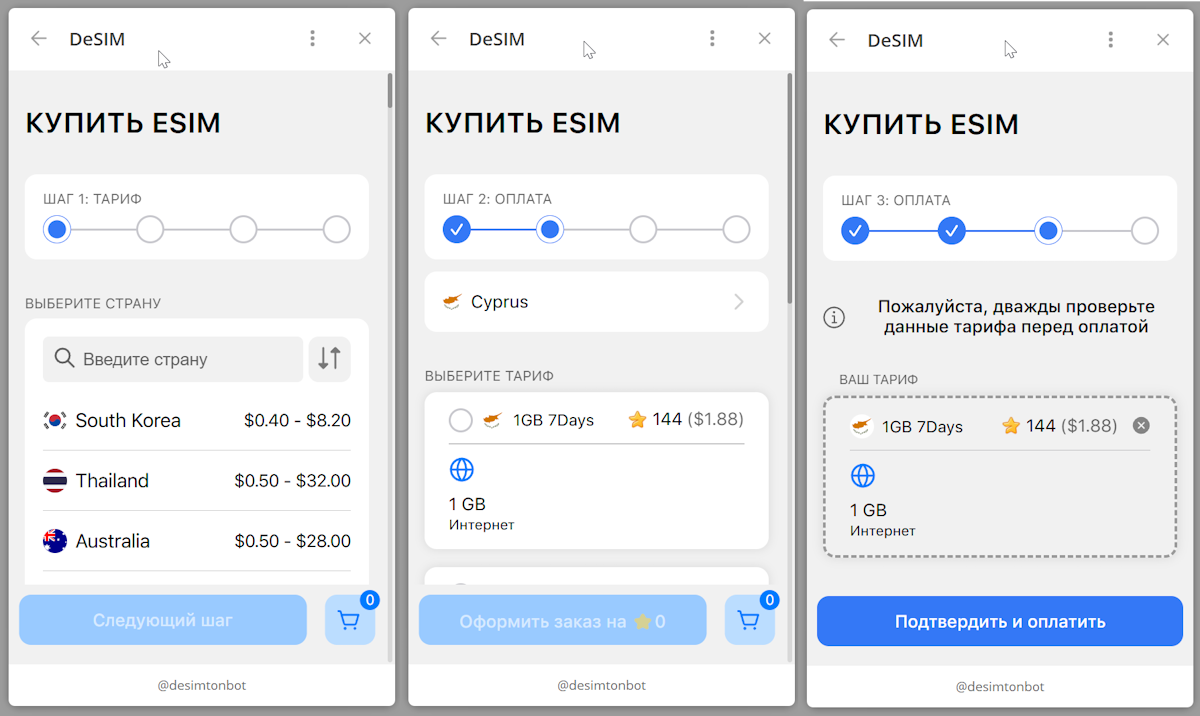
Juggling trips to Japan, Germany, and Brazil back-to-back, I rely on my eSIM app’s profile management to avoid swapping physical cards. I preload a separate eSIM profile for each country before I leave home, naming them clearly—like “Tokyo Week” or “Berlin Business.” When I land, I simply switch profiles in my phone’s settings, instantly activating local data without hunting for Wi-Fi. I keep one profile for my home carrier always active but disabled, ensuring I don’t rack up roaming fees while still receiving iMessage verification codes. Deleting used profiles after a trip keeps my list clean, preventing confusion when I need to activate a new Japan plan next month.
Storing backup plans without conflicts
To store backup plans without conflicts when managing multiple eSIM profiles for different countries, assign a dedicated conflict-free backup profile structure by labeling each eSIM with its destination and activation date in your device’s settings. Disable automatic data switching between profiles to prevent unintended fallback to a primary plan. Store inactive backup eSIMs as QR codes or installation links in a secure, offline note file, only activating them after fully deleting the current active profile. This avoids registration clashes with the same network.
Q: How do I prevent a backup eSIM from overriding my active travel profile?
A: Keep only one profile enabled at a time and use your phone’s “Cellular Plans” menu to manually toggle off all others before installing a new backup.
Labeling profiles for quick identification
When managing multiple eSIM profiles for different countries, labeling profiles for quick identification is essential to avoid data mishaps. Rename each profile with the country name and travel dates, such as “Japan – Oct 2024,” to differentiate a primary data plan from a backup. For advanced organization, append the carrier or data allowance, e.g., “Spain – 5GB (Movistar).” This system prevents manual checks in settings, especially when juggling active lines. Use profile naming immediately after installation to ensure seamless switching at borders or during layovers. A simple label saves precious travel time.
| Label Format | Use Case |
|---|---|
| Country + Month+Year | Single-destination trip |
| Country + GB + Carrier | Multi-plan or backup line |
Deleting old plans to free up space
When managing multiple eSIM profiles for different countries, deleting old plans to free up space is essential for seamless travel. Outdated profiles can clog your device’s limited eSIM storage, preventing you from installing a new plan for your next destination. Regularly purge expired or unused eSIMs to avoid frustrating “no space” errors at the airport. This quick cleanup ensures you can instantly activate your next international data package without delays.
- Remove expired plans after your trip to clear storage for new regional eSIMs.
- Delete duplicate profiles for the same country to keep only the most cost-effective option.
- Prioritize deleting large, unused eSIMs first to maximize free space for upcoming travel.
Security and Privacy Tips on Roaming Data
I download an eSIM before leaving home, but security and privacy on roaming data still depend on my habits. In a café in Bangkok, I avoid using public Wi-Fi alongside my cellular profile, because that dual-connection can leak traffic. I also disable the eSIM’s data when I’m not actively navigating—this cuts exposure to local tower snooping.
A single- eSIM line is more private than juggling two active profiles, as stray data requests can’t cross planes.
Before sleeping, I toggle the eSIM off entirely, so my device stops signaling its presence to unknown networks. These small actions keep my roaming session tight, not just convenient.
Using a VPN alongside your virtual line
When using an eSIM for travel, pairing it with a VPN encrypts all traffic passing through your virtual line, shielding logins and financial transactions from rogue hotspots. The VPN creates a secure tunnel from your device to a remote server, ensuring your ISP—or the local carrier providing your eSIM—cannot see which sites you visit. This is critical because an eSIM’s data route may pass through jurisdictions with weak privacy laws. For maximum protection, activate the VPN before connecting to any network, ensuring the encrypted tunnel is established before traffic flows through the virtual line.
Always activate the VPN before the eSIM’s data connection to encrypt traffic from the first packet, preventing exposure on untrusted roaming networks.
Avoiding public hotpots even with extra data
Even with a generous eSIM data plan, avoid connecting to public Wi-Fi hotspots. These networks are prime attack vectors for data interception and man-in-the-middle attacks, regardless of your data allowance. Your roaming eSIM provides a direct, encrypted cellular tunnel; using a public hotspot introduces an unsecured local link that bypasses this protection. For critical operations like banking or accessing work emails, rely solely on your secure eSIM cellular connection rather than any available free Wi-Fi.
- Treat public hotspots as untrusted networks, even if they appear legitimate.
- Disable automatic Wi-Fi joining on your device while roaming.
- Use your eSIM data for all sensitive transactions instead of hotspot connections.
Checking provider encryption standards
When picking an eSIM for travel, dig into whether your provider uses strong end-to-end encryption for data in transit. Look for mentions of AES-256 or TLS 1.3 in their FAQs or security docs, as these standards shield your passwords and messages from being intercepted on unfamiliar networks. Avoid providers that are vague about their encryption methods or rely solely on basic security. A quick search for “encryption protocol” in their support pages can confirm their commitment. If they can’t describe it clearly, choose another vendor.
Always verify that your eSIM provider uses robust encryption standards like AES-256 or TLS 1.3 to protect your roaming data.